Every email marketing service is a little different, but they all accomplish the same thing: Communicating with your audience consistently to build long-term relationships.
In this guide, we’ll walk you through the process of setting up your account and creating your first campaign. By following these simple steps, you will be able to start reaching out to your customers and building trust.
This guide isn’t meant to be completely comprehensive for every email marketing service. We’ll cover the 80/20 that’ll apply to every popular email marketing software (EMS), including Active Campaign, Mailchimp, Drip, Hubspot, and others. Let’s jump in.
Define Your Email Marketing Goals
Before you start using your email marketing software, it’s important to take a step back and think about what you want to achieve with your campaigns. Do you want to increase sales? Drive more traffic to your website? Get people to sign up for your newsletter? All the above?
It’s worth considering your objectives and what you truly want to achieve with email, since this will influence the type of campaigns you send, whom you target, the content you include, and how you evaluate success.
For example, if your goal is to increase sales of a particular product, you’ll want to send highly targeted campaigns with strong calls to action that encourage recipients to buy. On the other hand, if your goal is to build brand awareness, stay top-of-mind, or improve customer loyalty, you may want to send more value-focused content like a newsletter with your latest blog posts.
Who’s Your Audience?
There are two approaches you can take with your emails: a more formal company approach (think company logo at the top and more stylized), or a more casual approach that feels like an email from a friend. Both are effective, but you need to decide what you want your email to be to your audience.
Regardless of what you choose, make sure it’s consistent so your readers know what to expect and when.
For more on defining your target audience, check out our complete guide on building your target buyer persona here.
Update Your EMS Settings
Now that you know your goals, the next step is to ensure your EMS settings are set up correctly.
First, make sure you have the correct mailing address listed at the bottom of every email. You can usually find this in your account settings. If you don’t have a physical mailing address, you can use a P.O. Box or your home address instead.
Next, set up your reply-to email address, which is where replies to your email campaign will be sent. Select this address based on your goals and how you want to position the marketing emails you send.
I recommend using a more general info@your-company-name.com email address if you’re sending emails on behalf of your business. If you want emails to be more personal and if they’re coming from a specific individual in your organization (like the owner), use that person’s email address as the reply-to email.
Either way, use an email address that a designated person checks frequently. Since people may reply to your emails, you’ll need someone monitoring the reply-to inbox.
Email Regulations
Now that you have your account set up, it’s important to be aware of email marketing regulations. Depending on where you live or where the people on your list live, there may be restrictions on the type of content you can send or how often you can send messages.
For example, email marketing in Europe is limited to recipients who’ve given consent. This means you can’t add people to your mailing list without their express consent. To learn more about privacy laws regarding email, here’s a helpful resource.
One other important note regardless of where you live is to make sure you include an opt-out option in every email so that people can unsubscribe at any time. This can be as simple as an unsubscribe link at the bottom of each email.
Create Your Email Template
Your email template will be the basic format you use to send ongoing (eg. weekly, bi-weekly, monthly, etc.) emails to your list. This template will be used as a starting point for all of your future newsletters.
Most email marketing services have a drag and drop editor that makes it easy to create your template. You can also use HTML or plain text if you’re comfortable coding.
When considering how to organize your email template, it’s helpful to think about it as three main sections:
- The header — includes your logo and/or introduction.
- The main content — think latest blog posts, featured company news, or a regular feature you want to include.
- The conclusion — an engaging ending and/or call to action.
At the very bottom, you’ll have the details we talked about above, including your mailing address and the option to unsubscribe at any time.
Set Up Two-Way Sync With Your CRM
If you’re using a CRM like Pipedrive that isn’t integrated directly with your email or your CRM is inside a project management tool like ClickUp, you’ll want to set up two-way sync so your email marketing software can pull in new leads and contacts automatically. This will save you the time of manually adding new subscribers to your list.
Most email marketing services have an integration feature that makes this easy. We recommend syncing at least the following fields:
- First Name.
- Last Name.
- Email Address.
- Company Name.
- Phone Number.
Upload Your Contacts to Your EMS
The next step is to upload your contacts to your email marketing software. This ensures that all of your subscribers are automatically added to your list and you don’t miss any opportunities to connect with them.
Most email marketing services make it easy to upload your contacts. All you need is a CSV file or Excel spreadsheet with all your contact information.
This will save you time in the long run and ensure that you’re building a relationship with all of your subscribers.

Test Your Emails Before Sending
Testing your emails before you send them to your list is important because it helps you make sure your messages appear the way you want them to appear. It also helps you catch any errors that could occur when the email is delivered. Even if it looks perfect in draft mode, testing can help discover hidden issues.
This is especially important if you’re using a template for your email. By testing the email, you’ll be able to see how everything looks on different devices and browsers. Use the quick checklist below when evaluating your test emails. Keep an eye out for:
- Text or graphics being cut off.
- Email going to spam folder.
- Images not showing up on different devices.
- Formatting errors.
- Incorrect spelling and grammar.
- Incorrect or wrong links.
- Typos.
- Email subject line length under 60 characters.
Have a savvy team member proofread and check the test email on both desktop and mobile devices.
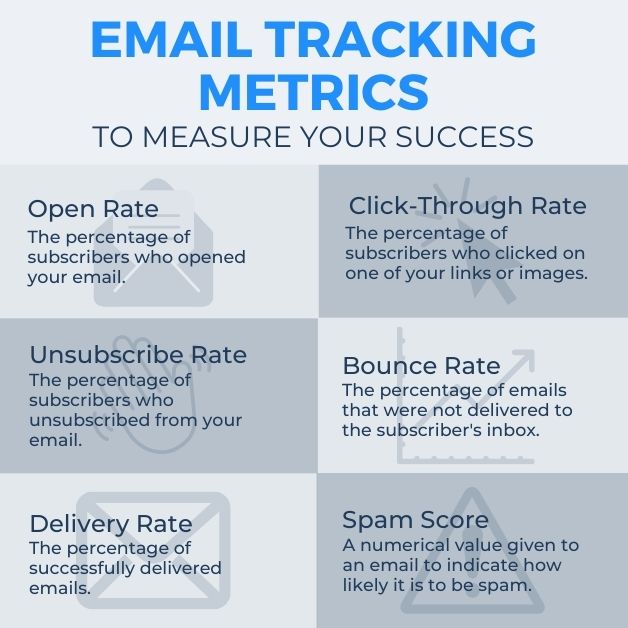
Set Up Your Email Tracking to Measure Success
Once you’ve sent a few test emails, it’s important to start tracking your email metrics to measure success. This will help you determine what’s working and what’s not, so you can make necessary adjustments.
There are several different email metrics you can track, but we recommend starting with the following:
Open Rate: The percentage of subscribers who opened your email.
Click-Through Rate: The percentage of subscribers who clicked on one of your links or images.
Unsubscribe Rate: The percentage of subscribers who unsubscribed from your email.
Bounce Rate: The percentage of emails that were not delivered to the subscriber’s email address.
Delivery Rate: The percentage of successfully delivered emails.
Spam Score: A numerical value given to an email to indicate how likely it is to be considered spam.
If you’re not sure where to start, we recommend using tools like Active Campaign or Mailchimp, which offer built-in email tracking features. These tools will help you track all of the above metrics and more.
While it’s important to know how engaging your campaign messages are, make sure you’re tracking actions that happen beyond your emails. How many clicks to your donation page are translating into real donations? What is the total amount of revenue generated from a single email?
By measuring your success, you’ll be able to determine what type of content is resonating with your audience and make necessary adjustments to improve future campaigns.
Set Up Your First Autoresponder
An email autoresponder (also referred to as an email sequence or email automation) is a prewritten series of emails that are automatically sent to your subscribers in response to specific actions they take, such as signing up for your email list or making a purchase.
There are several different software options available, but we recommend using Active Campaign or Mailchimp, which offer powerful automation features and templates that make creating an autoresponder series easy.
Once you’ve created your autoresponder, all you have to do is write the individual emails and set the schedule. We often recommend sending one email per day for the first week, followed by one email every other day for the next two weeks. After that, you can space out your emails as frequently or infrequently as you’d like.
Wondering what types of email autoresponders you should queue up? Check out our list of 7 simple automated email sequences you can get started with here.
Conclusion
Now that you know the basics of email marketing, it’s time to put these tips into action! Start by making sure your settings are correct, then create your template and send a few test emails.
Once you have a good grasp of what’s working and what’s not, set up your autoresponder sequence. And lastly, don’t forget to measure your success based on your goals.


